Monday, December 3, 2018
Tuesday, November 27, 2018
Designing the Cutaway
Designing the Cutaway/Turning the Design
Week 16 - Novermber 27, 2018
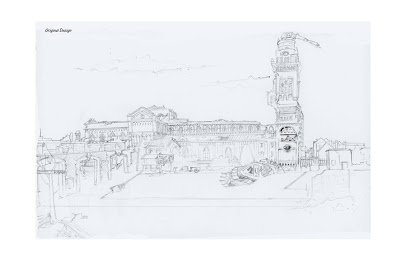
Zelma Original Design -
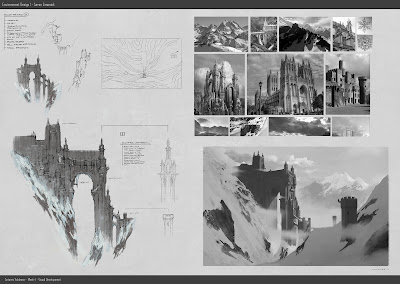
Art Director Notes -
Week 16 - Novermber 27, 2018
Zelma Original Design -
Art Director Notes -
Monday, November 12, 2018
Building a House
Building a House - Designing Structures for a Game Environment
Week 13 - November 13, 2018
Develop the landscape designed for your level of game play in War Horse.
Focus on the structures of interest and design them in detail. Buildings that are open for movement will require an interior design and cutaway view. Background buildings may be closed off to the interior and still allow access to the roof, balcony or cellar.
An accurate scale should be present in every design, showing the comparative size of the main character to the main structure. Include a yardstick or meter scale for larger reference.
Design your structures based on the isometric view initiated from the battlefield map. All structures and set dressing should follow the same horizon in the isometric view of the battlefield.
Examples of Terrain Maps:
Examples of Structure Design:
NOTES:
Below are notes for artists who have submitted work to me with questions or inspiration. The notes are not mandatory, just suggestions.
Alexander (Original Design):
Art Director Notes (for Alexander):
Houston (Original Design):
Art Director Notes (For Houston):
Zelma (Original Design):
Art Director Notes (For Zelma):
Zelma (Original Design):
Art Director Notes (For Zelma):
Add MORE Details.
Zelma (Original Design):
Art Director Notes: (For Zelma):
Zelma (Original Design):
Art Director Notes (For Zelma):
For the "Green Tank", I cut off the right side tread and resized it and lowered it compared to the tank body so the perspective was more inline. I extended the width of the tank body because the treads were too close together. The tank will look more menacing if it is wider and more of an obstacle. -F
Unknown (Original Design):
Art Director Notes (For Unknown Artist):
Develop the elevations in the circled area of your battlefield terrain map. -F
Tuesday, November 6, 2018
Laying the Foundation in Story and Environments
Laying the Foundation in Story & Environment Design - Week 12
Write the Outline for the Game Level chosen in War Horse & Design the 3D Groundplane for a detail of the Level Battlefield.
Week 12 - NOV 6, 2018
Write an outline for the action taking place in the chosen War Horse level. The War Horse video game is broken up into 10 distinct levels based on significant battles of WWI:
Level 1 - "The Battle of the Marne" (6 - 10 SEP 1914)
Level 2 - "The Battle at Gallipoli (25 APR 1915 - 9 JAN 1916)
Level 3 - "The Battle of Jutland" (31 MAY - 1 JUN 1916)
Level 4 - "The Battle of Verdun" (21 FEB - 18 DEC 1916)
Level 5 - "The Battle of the Somme" (1 JUL - 18 NOV 1916)
Level 6 - "The Brusilav Offensive" (4 JUN - 20 SEP 1916)
Bonus Level - "The Battle of Aqaba" (6 JUL 1917) - Lawrence of Arabia
Level 7 - "The Third Battle of Ypres" (31 JUL - 10 NOV 1917)
Level 8 - "The German Spring Offensives" (21 MAR - 18 JUL 1918)
Level 9 - "The Battle of Amiens" (8 - 11 AUG 1918)
Level 10 - "The Battle of Megiddo" (19 - 25 SEP 1918)
Bonus Level - "The Meuse-Argonne Offensive" (26 SEP 1918) - SGT York
End of Game - "Armistice Day" (11:00 11 NOV 1918)
Make a list of interesting, historical details that would add drama to the game play for a particular level. For example, at the start of the Battle of Amiens, the opening phase of the Allied Hundred Days Offensive would ultimately lead to the end of World War I. Allied armored divisions smash through the once impregnable German trenches. German General Erich Ludendorff calls it “the black day of the German Army.”
Another interesting anecdote from WWI:
"A goat named Bill was pulling a cart in a small town in Saskatchewan when a train, carrying soldiers on their way to fight in the First World War, stopped. The girl who owned Bill let the soldiers take him along as a good luck charm. Mascots were not supposed to go to the front lines, but the soldiers had become very attached to the goat so they hid him in a big crate and took him with them.
Sergeant Bill, as the goat was called, was a big help. He saw action beside his human friends in many battles, including one where he pushed three soldiers into a trench just seconds before a shell exploded where they had been standing.
Despite being wounded several times, Sergeant Bill survived the war. Once the fighting was over, he was even part of a big parade in Germany, proudly wearing a fancy blue coat with his sergeant stripes. He then returned to his hometown where he was reunited with his owner. " (from Veterans Affairs Canada website)
"Not all animals are helpful. During the First World War, more than 90% of the soldiers in the trenches had lice. The pesky little insects made the men itch badly and they could spread a disease called trench fever.
Mice and rats were also a big problem in the trenches and on warships, too. They chewed on supplies and equipment, ate the food, and spread diseases.
Canadian soldiers who have served in far-off lands, like Korea, Somalia and Afghanistan, had other pests to worry about, as well. They had to keep their eyes open for dangerous spiders, scorpions and snakes that could sneak into their tents, sleeping bags and empty boots." (from Veterans Affairs Canada website)
The game story will be broken down into 3 acts: Act I - The War to End All Wars (1914 - 1916), Act II - The Slaughter (1917), Act III - The Tide Turns (1918).
The Structure of Story
(from the video by Will Schroer)
ACT I
SEQUENCE 1 - Status Quo & Inciting Incident
Establishes the central character, his/her life, and the status quo and the world of the story. It usually ends with the POINT OF ATTACK or INCITING INCIDENT, but this plot point can sometimes appear earlier in the first few minutes of the game story.
SEQUENCE 2 - Predicament & Lock In
Sets up the predicament that will be central to the story, with the first intimations of possible obstacles. The main tension will be established at the end of the act. The sequence ends when the main character is LOCKED IN the predicament, propelling him/her into a new direction to obtain his/her goal.
ACT II
SEQUENCE 3 - First Obstacle & Raising the Stakes
The first OBSTACLE to the central character is faced, and the beginning of the elimination of alternatives begins, often a time where EXPOSITION left over from ACT I is brought out. Since our character is locked into a situation and can't simply walk away, the stakes are higher - there is a lot more to lose.
SEQUENCE 4 - First Culmination/Midpoint
A higher OBSTACLE, the principle of RISING ACTION is brought in and builds to the FIRST CULMINATION, which usually parallels the RESOLUTION of the game/story. If the story is a tragedy and our hero dies, then the first culmination (or midpoint) should be a low point for our character. If, however, out character wins in the end of the game, then Sequence 4 should end with him winning in some way.
SEQUENCE 5 - Subplot & Rising Action
The SECOND ACT SAG can set it at this point if there isn't a strong SUBPLOT to take over the drama for a while. We still want a RISING ACTION, but we are not ready for the MAIN CULMINATION yet.
SEQUENCE 6 - Main Culmination/End of Act 2
The build-up to the MAIN CULMINATION - back to the main story line with a vengeance. The highest obstacle, the last alternative, the highest or lowest moment and the end of our main tension come at this point in the game. We should get a first inklings of the new tension that will carry the player through the third act.
Since most midpoints and endings are paralleled, the PLOT POINT at the end of Act 2 is usually at a polar opposite of those two points. So, if our hero wins at the midpoint and at the end of the game, then he is usually at this lowest point here.
ACT III
SEQUENCE 7 - New Tension & Twist
The full yet simple, brief establishment of the third act tension with its requisite exposition. Simpler, faster in nearly all ways, with rapid, short scenes and no real elaborate set-ups. The TWIST can end this sequence or come at the start of the eight sequence.
SEQUENCE 8 - Resolution
Hell-bent for the RESOLUTION. Clarity is important. If the character turns left, all is well, if they go right, the world as we know it ends. Not that we don't have complex opinions about what this amounts to, but at this point the player craves clarity. Will he get the girl, defuse the bomb, turn in his murderous brother and escape from the sinking boat surrounded by sharks?
The outline for your "Battle Level" must include these five CORE ELEMENTS:
- The PROTAGONIST and his/her goal
- The SUPPORTING CAST and what they each want
- The BEGINNING and END of the battle/sequence
- The 5 MAJOR PLOT POINTS
- The ORDER of EVENTS
Drawing the FOUNDATION of your ENVIRONMENT:
- Design the PLAN VIEW of the game area.
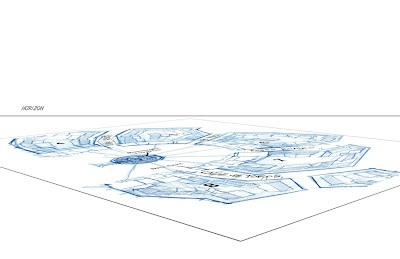
- Using Photoshop, DISTORT (Edit, Transform, Distort) the PLAN VIEW so it appears to be laying on a horizon below the viewer. This will create the illusion of the map/plan view being in 3D space.
- EXTRUDE or DEPRESS any major terrain features from the plan view, this will include mountains, rivers, canyons, coastline and ocean.
- EXTRUDE the major landmarks VERTICALLY from the plan view. This will create a faux perspective or ISOMETRIC view.
Isometric projection is a method for visually representing three-dimensional objects in two dimensions in technical and engineering drawings. It is an axonometric projection in which the three coordinate axes appear equally foreshortened and the angle between any two of them is 120 degrees. (Wikipedia)
- DETAIL the surfaces extruded from the PLAN VIEW. These surfaces will develop the structure of the buildings depicted in the plan. Trees, vehicles, people and smaller set dressing items can be added at this point.
- INDICATE a LIGHT SOURCE and lightly RENDER the dimensional surfaces and lay in the cast shadows.
Subscribe to:
Comments (Atom)


